1976 Honda CT90 K7 Engine
Restoration of an old Honda CT90
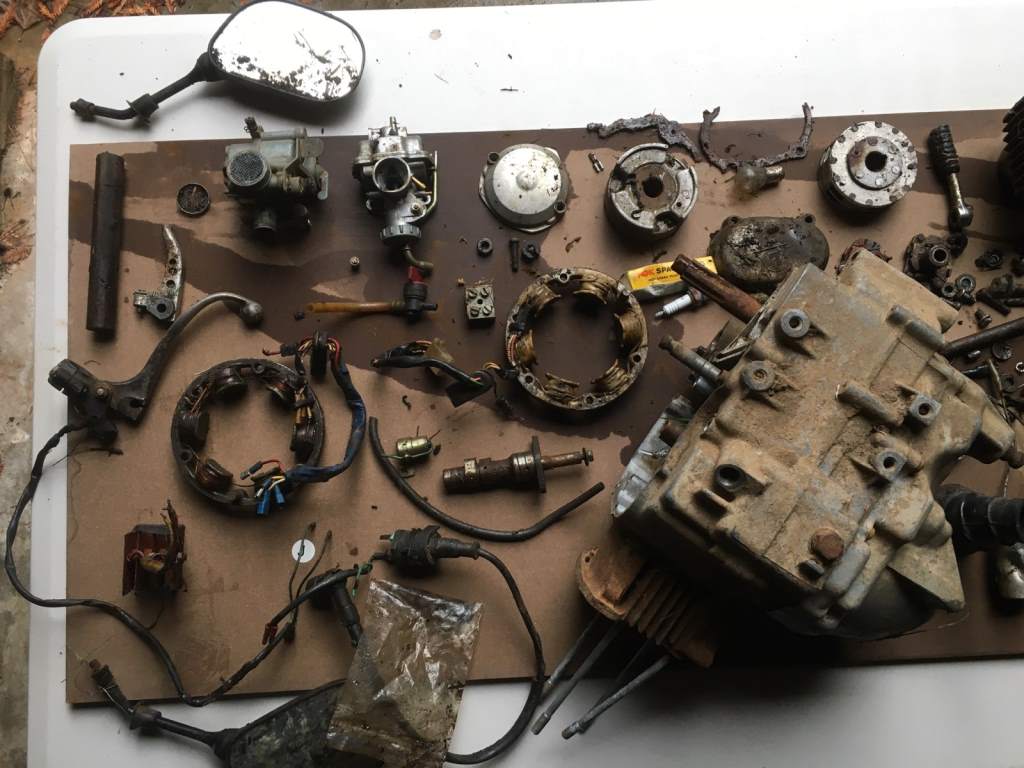
It all started when I bought myself a Honda C90. When it arrived, it came with a large amount of spares. When I say spares, my inital reaction was junk, but as time went on, the more I looked at the "junk", the more I thoiught I could do with it.
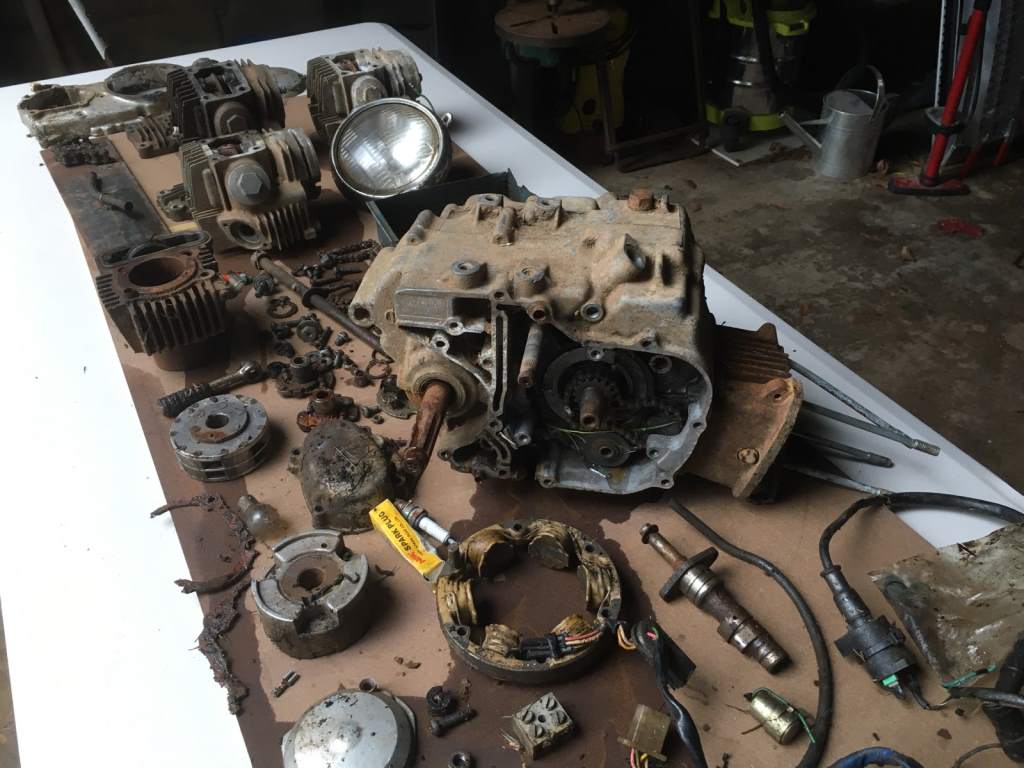
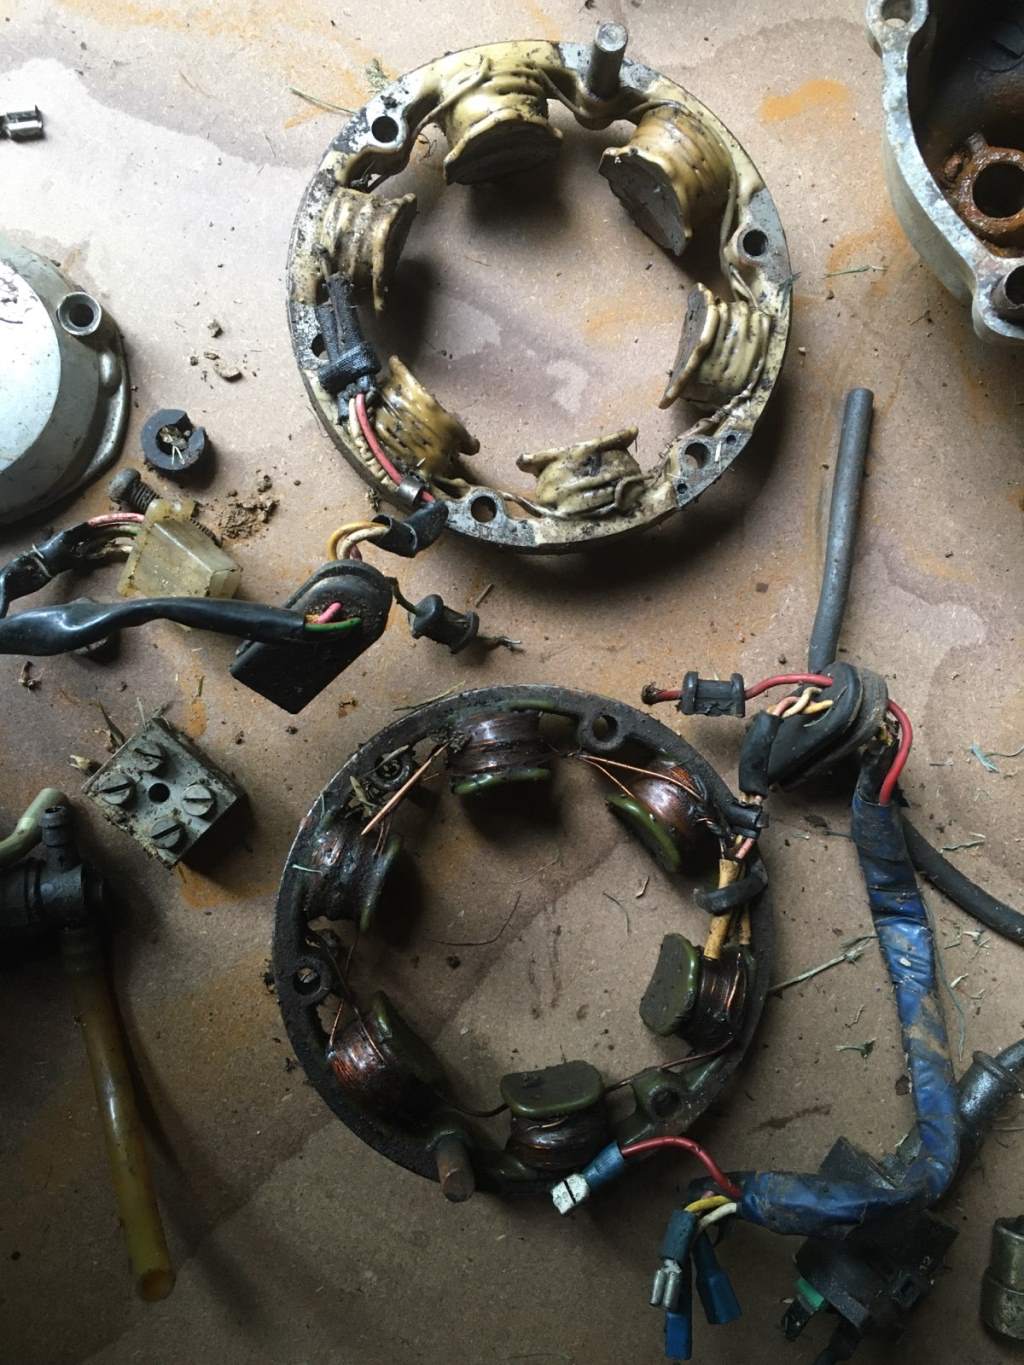
Here are a bunch of photos of a lot of the bits that came with the bike. Pretty rough.....

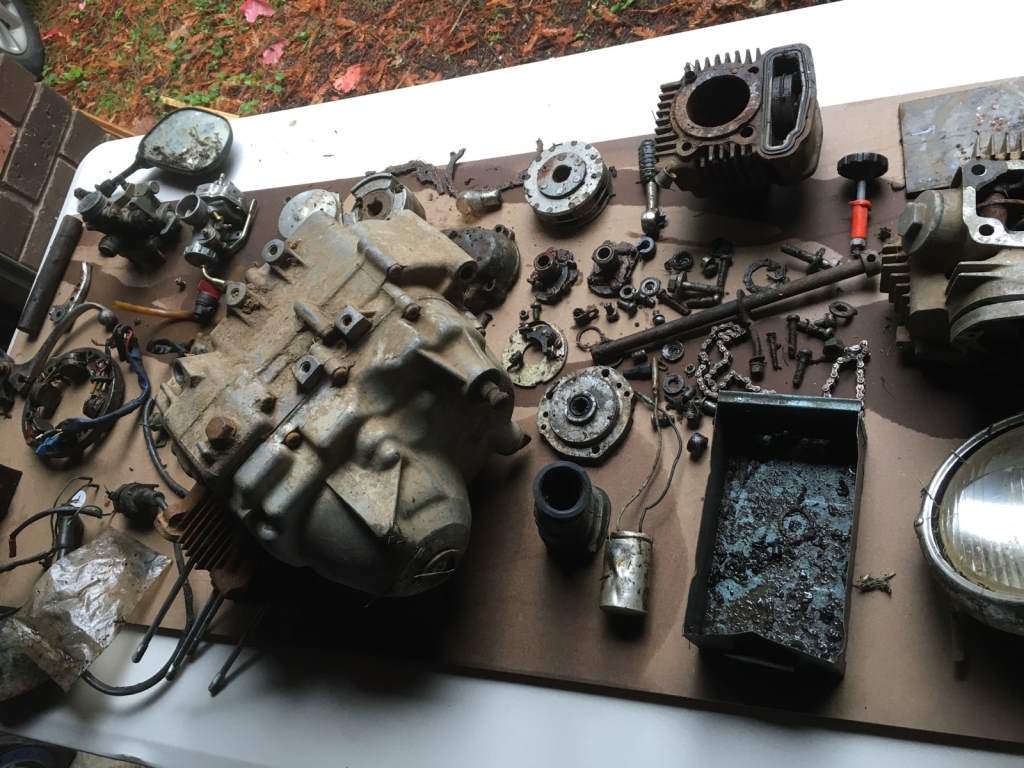

While ratting through all the bits and pieces, I had a stupid idea.
These engines have a great reputation for being super rugged and reliable, you even see guys on YouTube/Internet running them without oil to see how long they go before blowing up. And they don't blow up.
So I thought I might have a go at putting the engine you see in the parts back together, and see if I could make it run, with no new parts, just the ones you see here. There are of course quite a few parts missing, so they will have to be bought. And there are some things that are fair game, and would be replaced for any decent engine rebuild. Things like Oil Seals, Gaskets etc.
But the basic premise would be to only replace lost parts, and consumables.
I have never rebuild one of these engines before, but as you can see elsewhere on this website, I have a C90 Delux that I am in the process of restoring. I've been working on the frame, because I wasn't game to start on the engine just yet. This CT90 Engine will be like a practice run for the C90. I know they won't be identical, but they will be close enough to give me a good idea of how to rebuild the C90 without destroying too much.
Can this old beat up CT90 live again? Who knows - I kinda doubt it, but lets find out.
29 November 2022
Well, first things first. I need to ID the Engine.
Honda's Engine No: should tell me all I need to know.
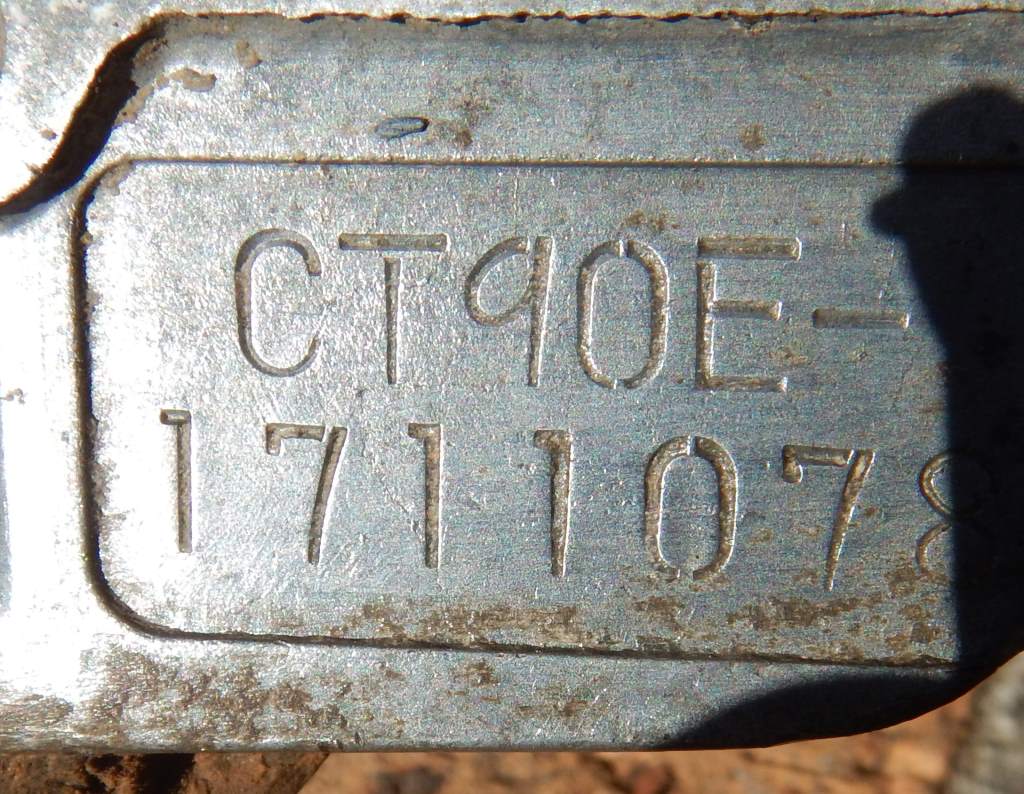
So after a little bit of research, I found I have a 1976 Honda CT90 K7 - the Dual Range model. Happy days.
What parts do I have, and what parts are missing? Its not easy to tell with the engine kinda together and a big pile of junk next to it.
I'll just have a look for the obvious stuyff at the moment - no doubt time will reveal a whole lot more missing bits.
So then, what's missing:
- The entire Sub-Transmission is missing - the only thing there is the Alloy Cover
- The Cam Tensioner rod/spring/bits seem to be missing
- A couple of the clutch adjustment bits don't appear to be there
- Really, who knows what is missing at this stage....but this list is a start.
If anyone out there has an old sub-transmission for the 1976 CT90, and wants to get rid of it, please contact me via the eMail on the Contacts page.
30 November 2022
I guess another thing I need to figure out is if this is doable. Is there anything that will stop the rebuild in its tracks even before it gets going.
Answer - Possibly. Check this out.
I suppose we've all got horror stories about seized pistons, but this one looks pretty ugly. Lots of corrosion all over the place, and not a bit of movement.
I guess I better see if I can free this up, if not, the project is dead in the water.

1 December 2022
I actually "started" on this engine about 8 months ago. I wanted to know I could get the thing unseized before I invested too much time in it, because as mentioned above, if I couldn't get the piston out, that was essentially the end of the project.
So way back then, I started to soaking the thing with anything I could get my hands on.
I started by just standing it upright, ie: with the piston vertical, and spraying it with INOX every time I walked past it in the workshop. I noticed that vertually none of the lube was soaking down the edge of the piston, which was not a good start.
So over the next couple of months I used WD-40, INOX, ATF/Acetone Mix, Diesel, just anything I could find that might help.
After about 3 months I started tapping at the top of the piston. And I really do mean tapping, nothing too drastic at this stage. But the results were not promising, no movement at all in the piston. I applied a good deal of heat, and more tapping. Nothing. Bugger!!
Over the next couple of months, more soaking, more heat and more tapping, but I must confess, the tapping was getting harder.
About 2 weeks ago I started to notice the lube was just starting to seep down the sides of the piston, and that gave me hope. Despite my urge to get after it with a hammer, I resisted. I have learned over the years that restoring old things is an exercise in patience rather than brute force. I leaned that by breaking many things that could have been salvaged over the years.
So I continued the tapping, the heating and the soaking and about 1 week ago, I noticed the piston had shifted down perhaps half a mm. NOt much I know, bute it was a start, and often, once you get these things started, you've got it beat. So from then on, once I had a bit of a well formed by the piston moving down the bore, I was able to do a better job of soaking the piston top, and I could see slightly more of the lube soaking down around the piston. From that point on, every time I walked past, I gave it a few taps with the hammer. I know I shouldn't really used the hammer itself - I usually use a piece of wood, but this thing was stuck so tight all that happened was the wood would splinter and flatten out.
But the good new is, it started moving more noticeably. It never got easy unteil I got the rings out the bottom of the bore. It fought me all the way. Perhaps 5 - 10mm per day and after about 5 days, the piston was out. Huzzah!!!!
Surprisingly enough, the piston walls looked OKish, so too did the rings. The bore looked really good, no marks at all, well nothing that a minor hone won't fix.
There was a bit of scoring on the piston, but again, not too tragic. Probably the worst marking on the piston was where I had been tapping the crown with a metal hammer for the past few months. Check it out.
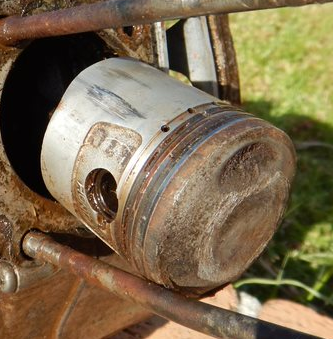
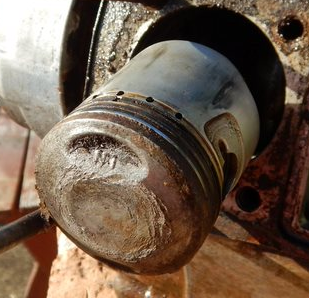
The rings are stuck, but I'm hoping to release them without a huuuuuge amount of drama. The question is, of course, given the goal of this projectd (to get this old engine going with aas many of the original parts as I possibly can), will I reuse the old piston?
My current thinking is "No". I don't like the look of the piston crown where I have been tapping it with the hammer. TEhe last thing I want is to get it all back together and running, only to have the piston crown explode and chuck metal pieces all through the engine. Hmmmm, when I think of it like tht, I have pretty much convinced myself. New piston.
3 December 2022
Because I have never stripped one of these engines before, I decided to do a bit of research about what I could expect.
As a result of my searching, I found some of the very best YouTube Videos I have ever seen, on this, or any other subject.
If you are interested in stripping down one of these style engines, even if you have a pretty good idea what you are doing, I very strongly suggest you watch the following two videos.
I learned a huge amount from these videos. If you search his YouTube Channel (Mini Motor Man) you will see that he has a mammoth 10 part series on the step-by-step reassembly of the engine as well.
4 December 2022
Right!!! Now the piston and barrel are off, I can get on to some serious disassembly.
The right side engine cover had been removed when I received the engine, but fortunately the cover itself came with all the parts. The cluth cover, ie: the left hand side engine cover was still in place.
Out with my J.I.S. screw drivers and loosen all the screws securing the cover. Loosen them all except one.......too tight to budge by hand. So out with the trusty Impact Screw Driver and and the screw came out without too much fuss - so now both side covers were off.
Since I had the Impact Screw Driver out, I thought I might just loosen the screws securing the crank case halves together. Once again, the J.I.S. Screrwdrivers worked brilliantly, except for one screw - way too tight to loosen by hand. Impact Screw Driver to the rescue - or so I thought!! For the first time ever, my Impact Screw Driver failed to get the screw out. It just completely stripped the screw head. So out with the Dremmel with a small cutting tool and cut a largish notch all the way across the screw head. That allowed me to use a large Flat Head bit for my Impact Driver. Once the notch was a good fit for my Impact Driver bite, had another go at it, and out it came with no worries.
I can't quite figure out why one of the Clutch Cover screws was locked so tightly. There were a few clutch bits sitting in my pile of parts, and once the cluctch cover was off, I n oticed a few of the bits were missing, and sure enough, some of them were in my pile of bits. So someone had definitely been in here before. All I can guess is they were in here a long, long time ago, and the engine had been left outside and corroded since then.
Now the clutch.6 December 2022
The clutch came of fairly easily.
Granted - at this stage, I am not stripping the clutch down, that can wait for the rebuild so actually, all I have done is pulled the cluth pack off the gear spline. But given the state of this engoine, I'm quite surprised, and very pleased it came off without too much of a struggle.
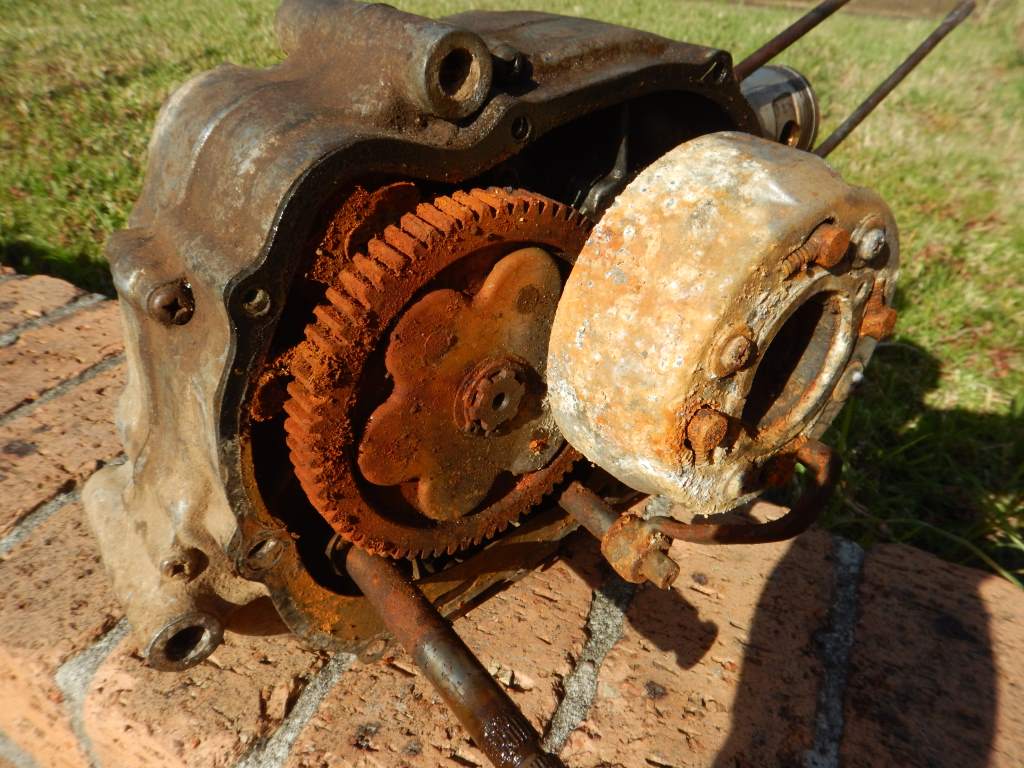

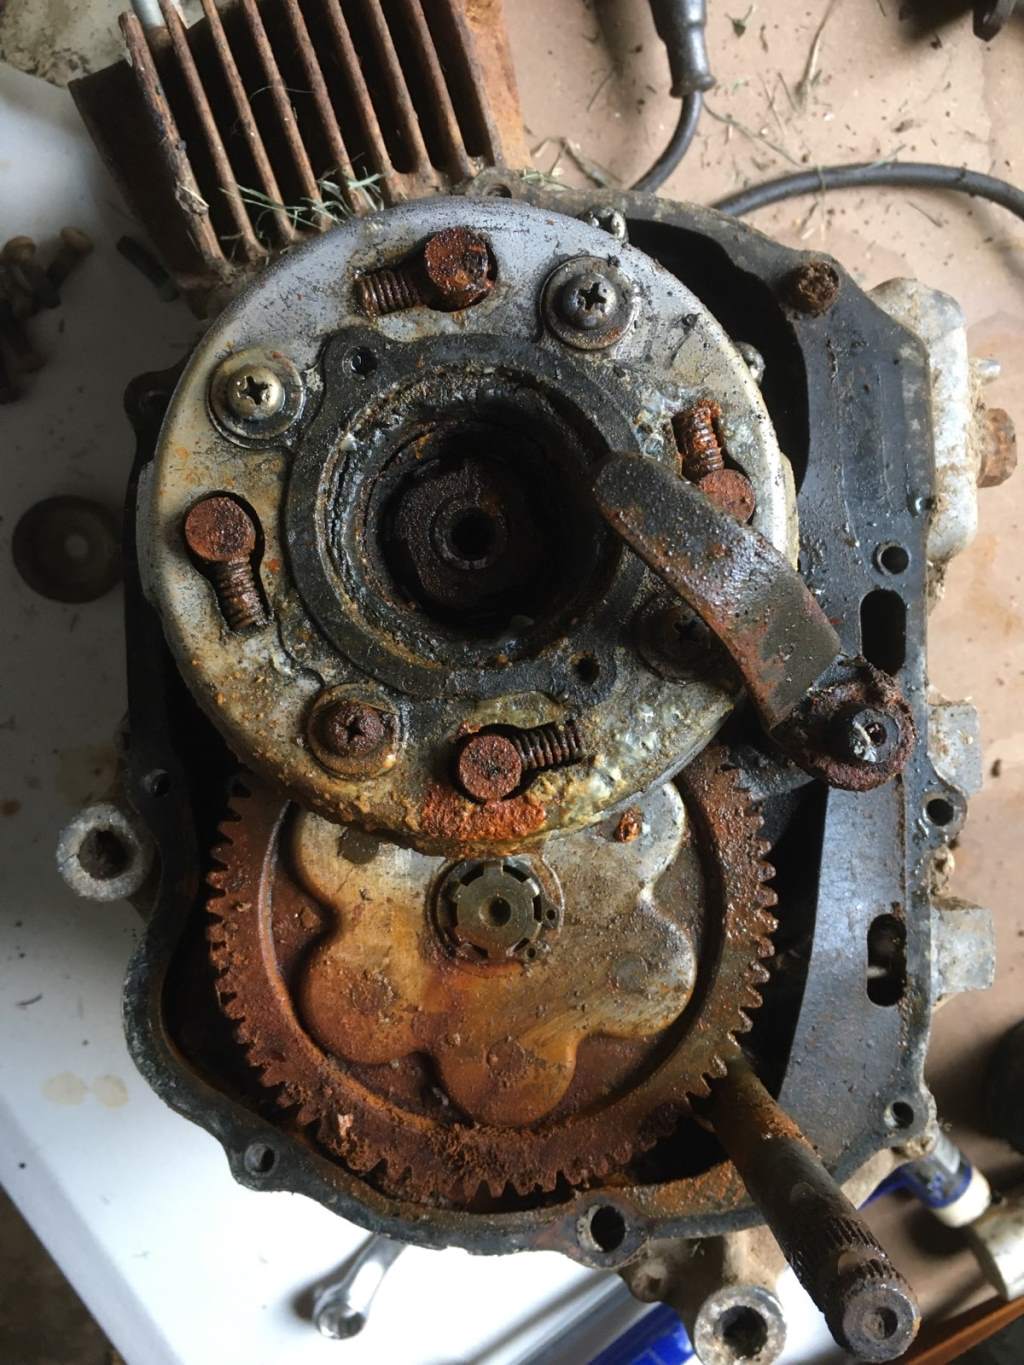
Then the big rusty gear. Again - came off without too many worried. Here's why it's called the Big Rusty Gear.
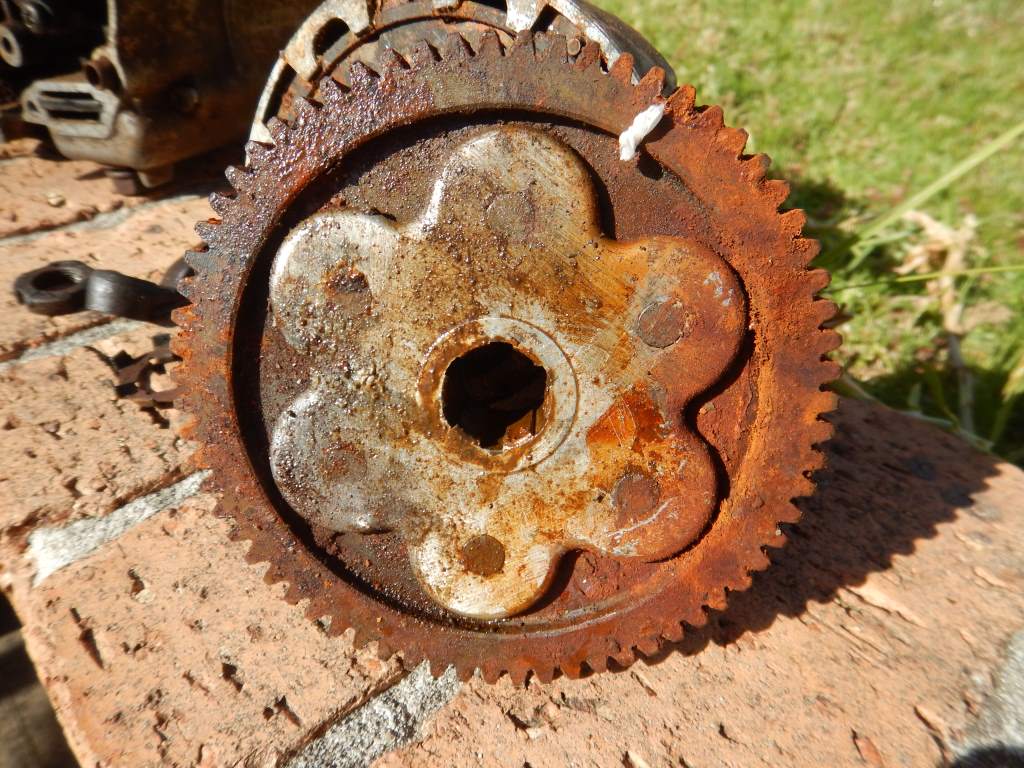
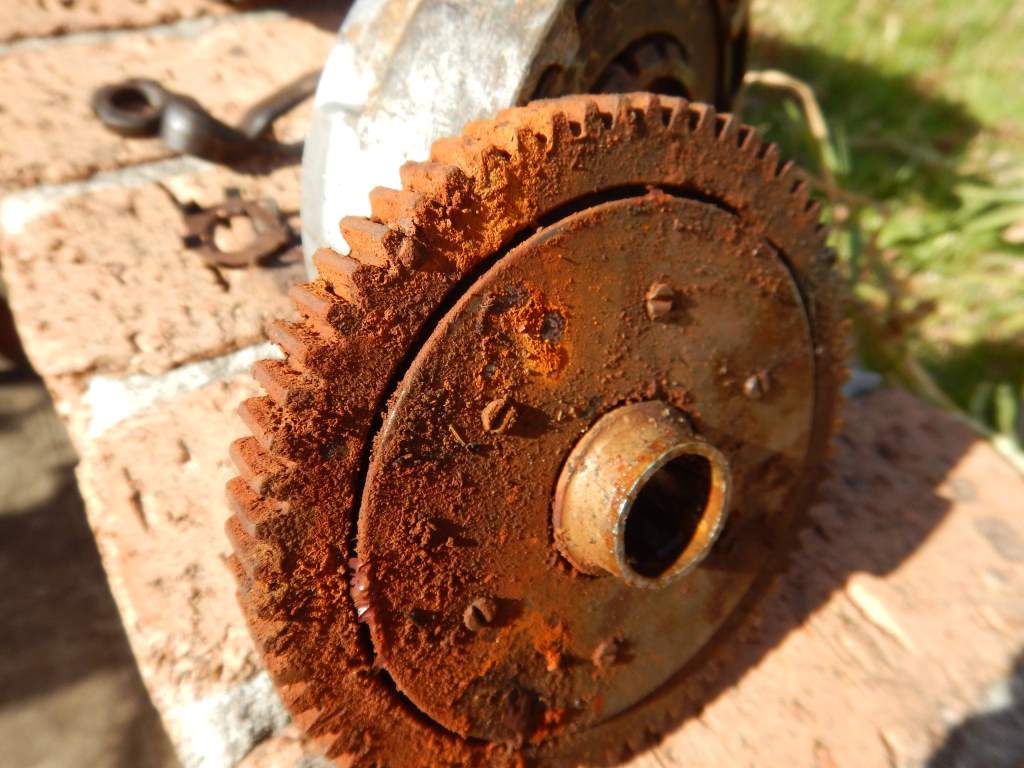
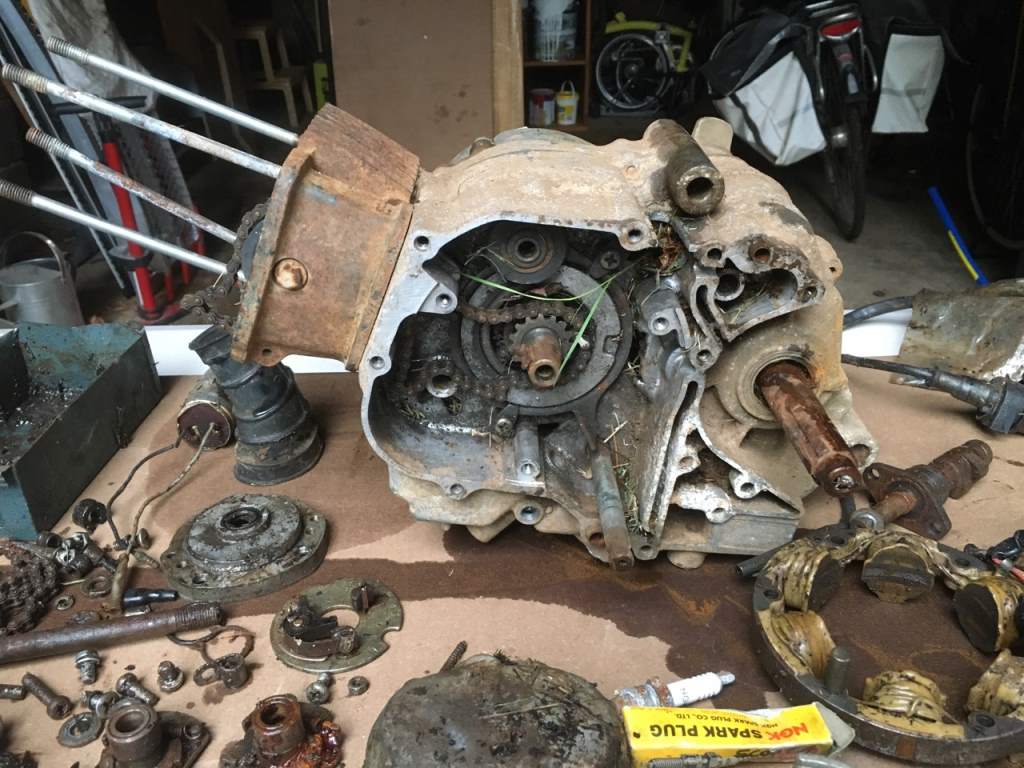
And here's what the clutch side of the engine looks like now.
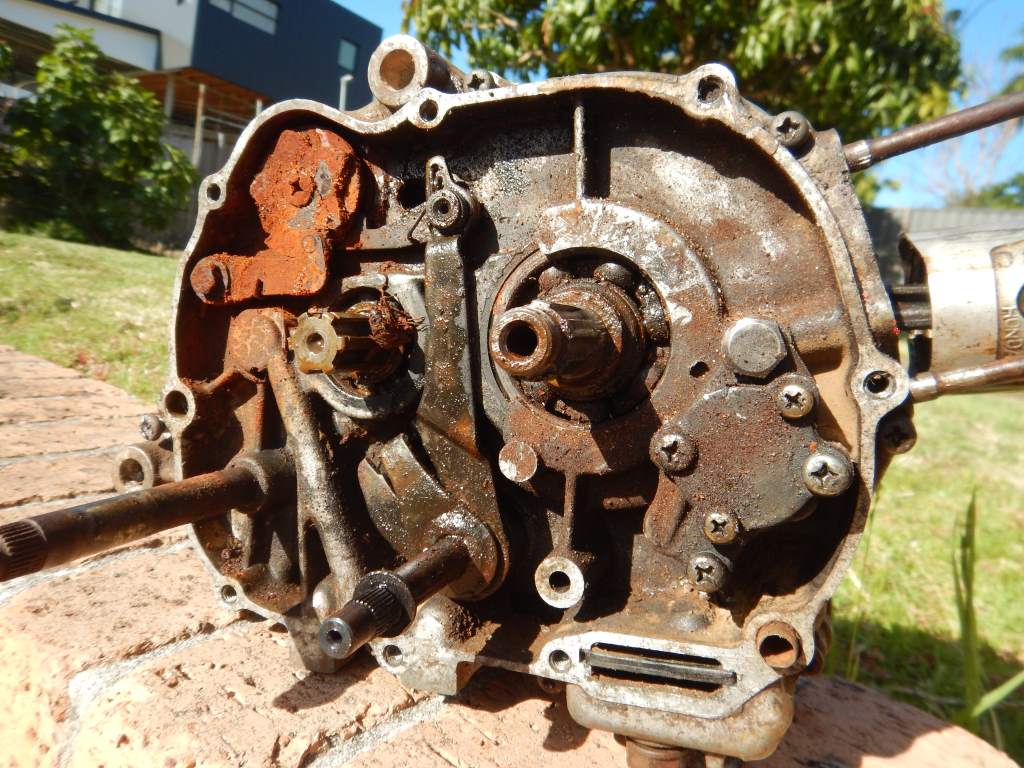
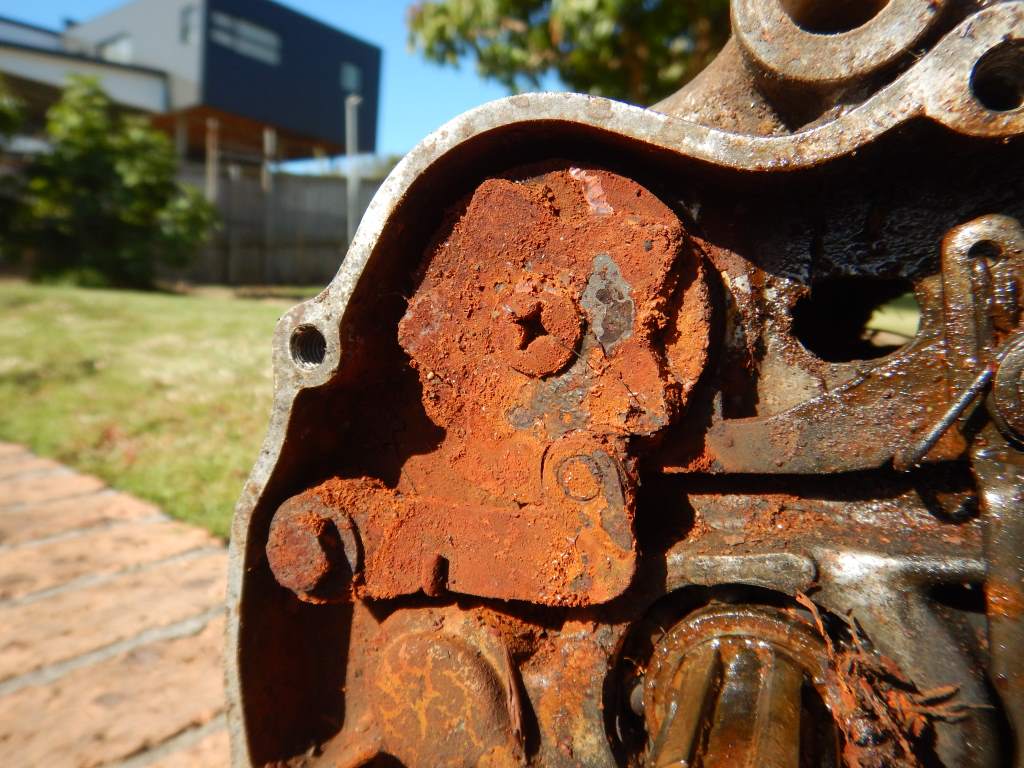
Behind the clutch and gear don't look too scarey, but the gear box, the end of the selector drum and its linkages look pretty crook.
8 June 2024
After much distraction from work - I haven't been able to get much done with the CT90 Engine. In fact work has been taking so much time away from my hobbies - I've decided to retire!! So from now on - no excuses.
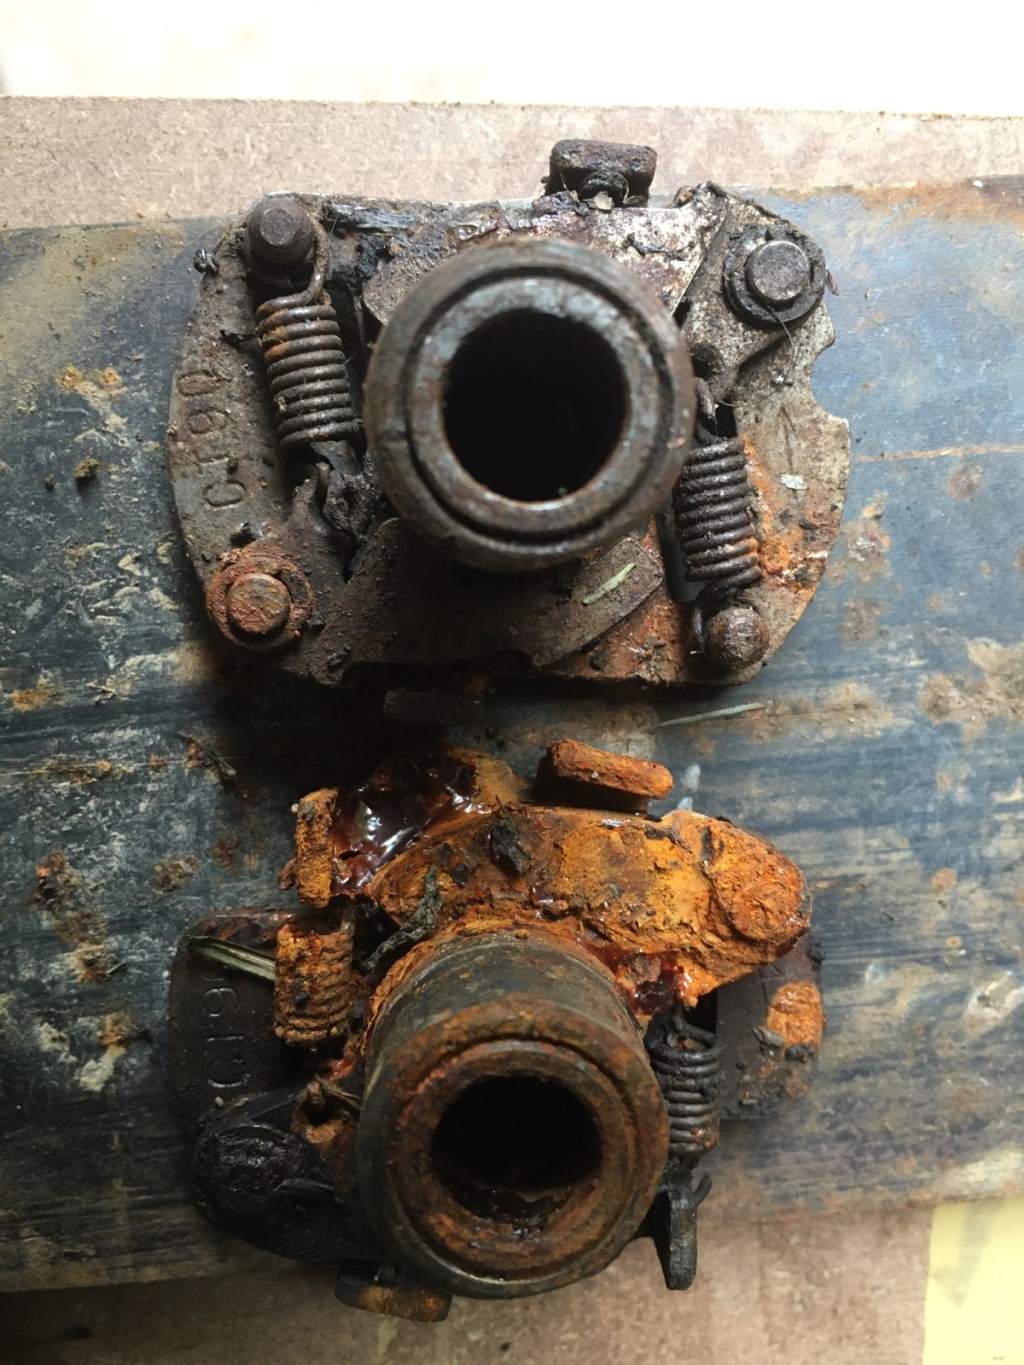
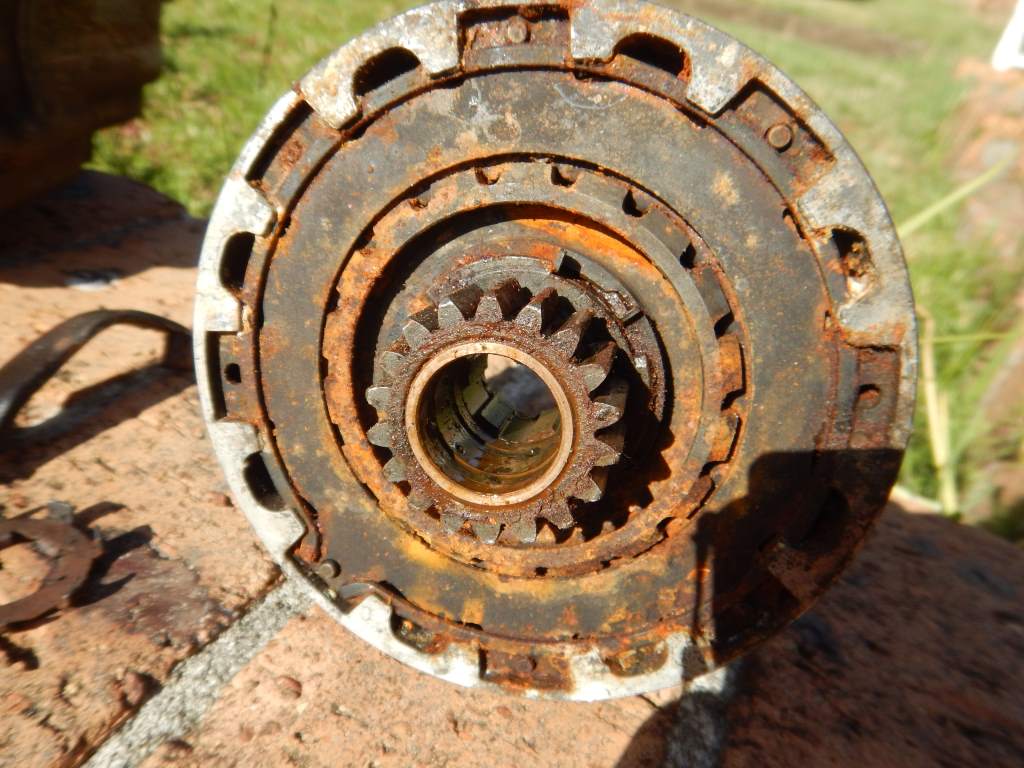
Since I have retired, things have got moving again. The entire engine, including the transmission has been stripped to its last nut and bolt. I didn't really want to strip it that far, but as you can see from above, there really was no choice - this engine was a complete write off - it even had grass growing out of the crank case - so perhaps you can imagine what a seized mess the tranisission was - there are photos above to help you imaging!!
Anyway - the whole thing is stripped - so let the cleaning begin.
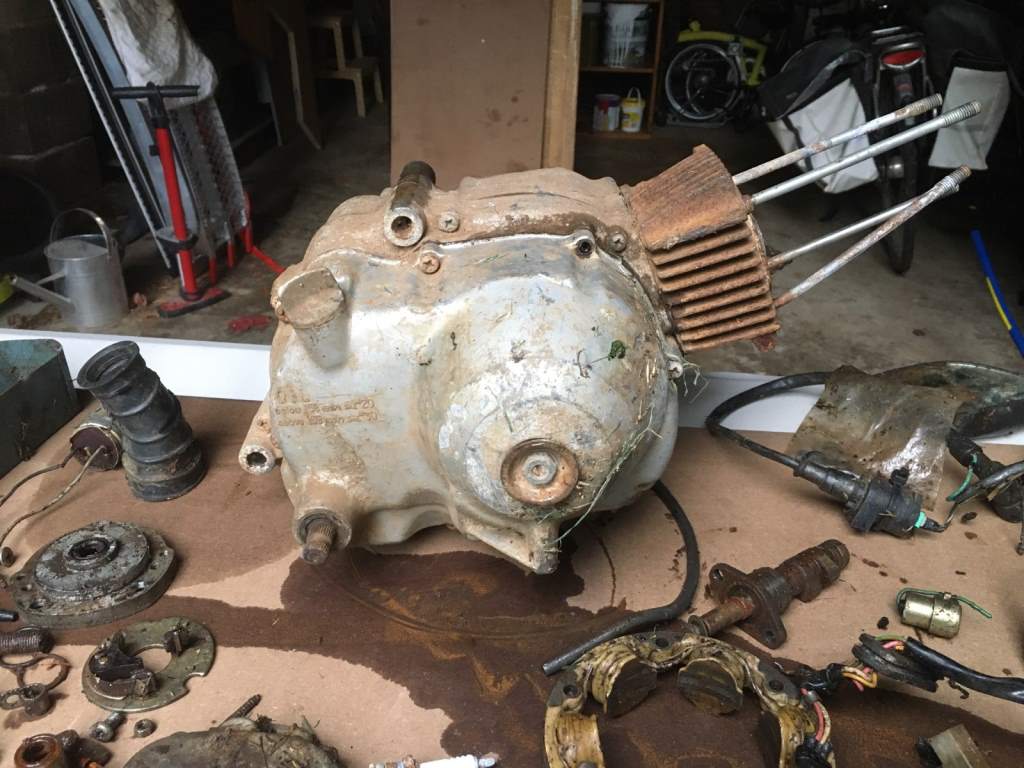
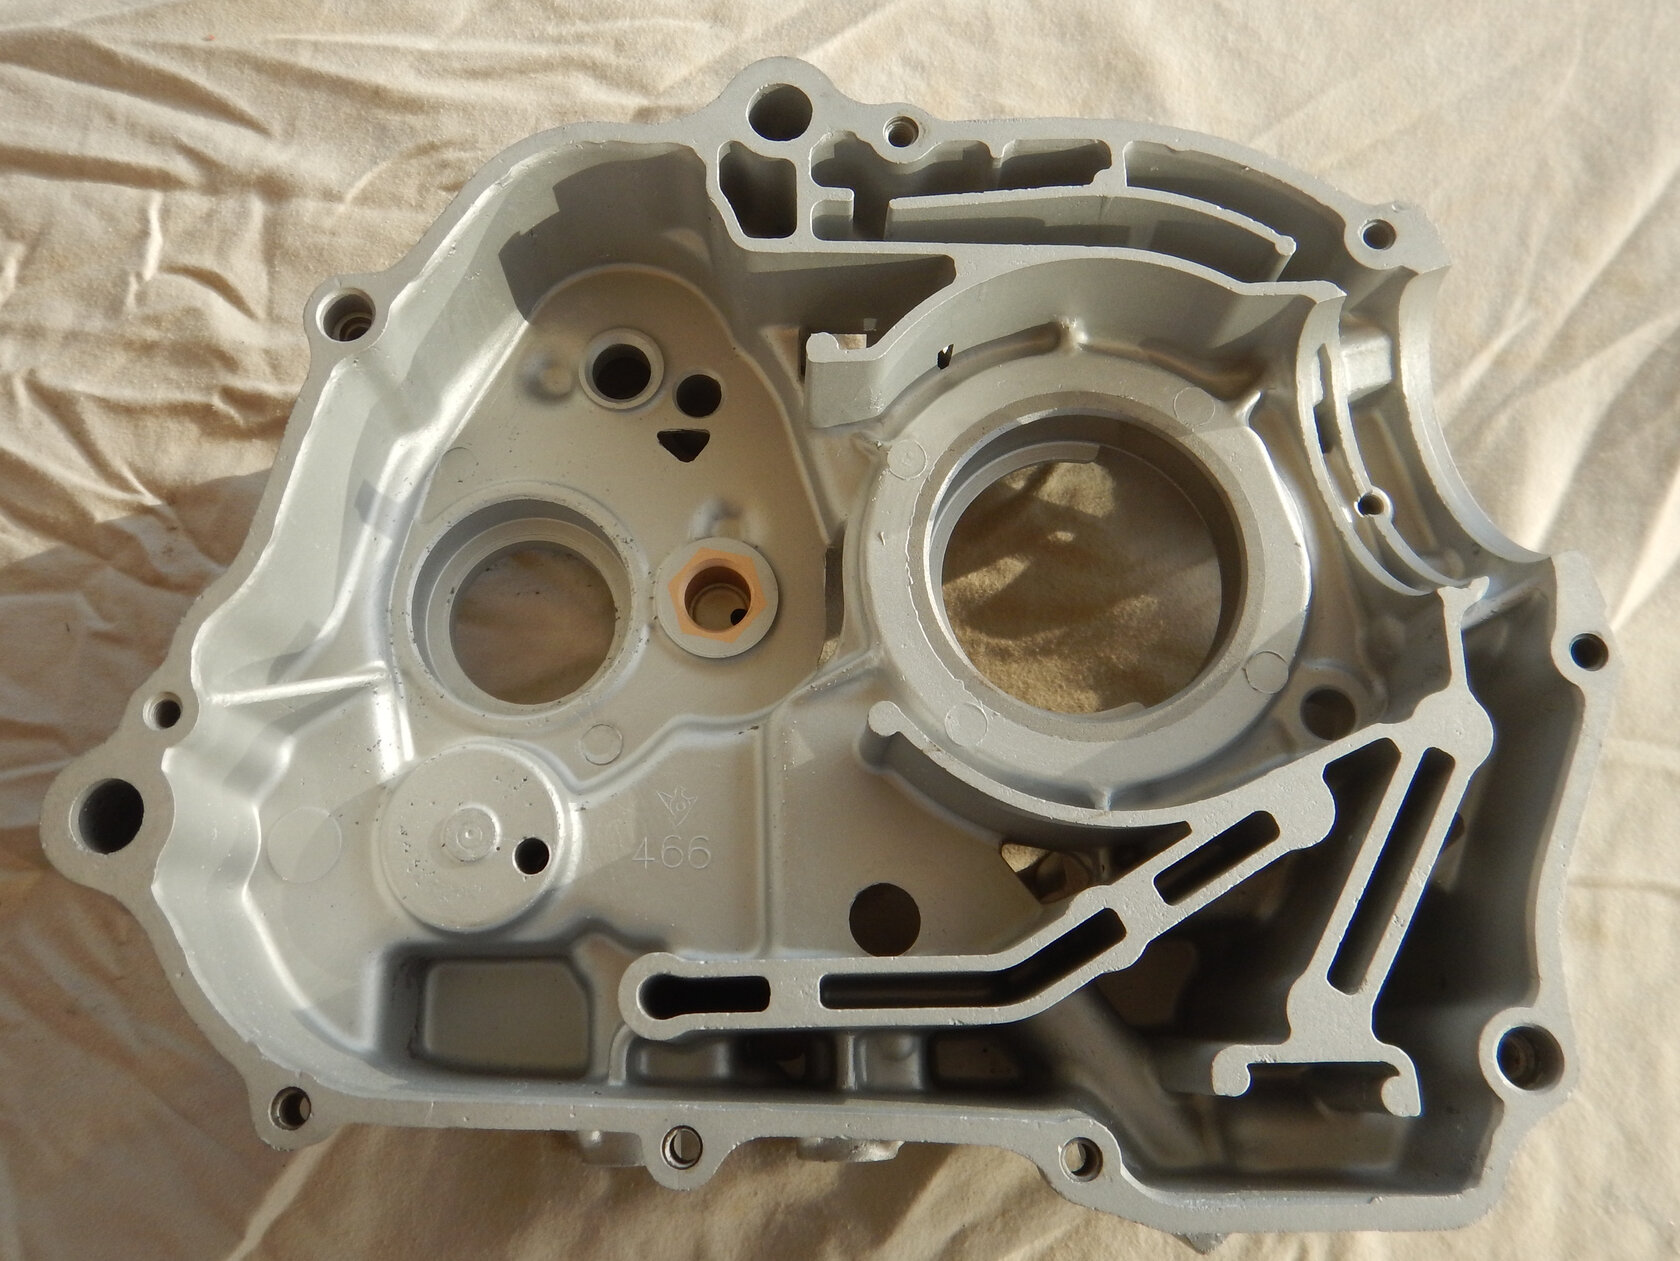
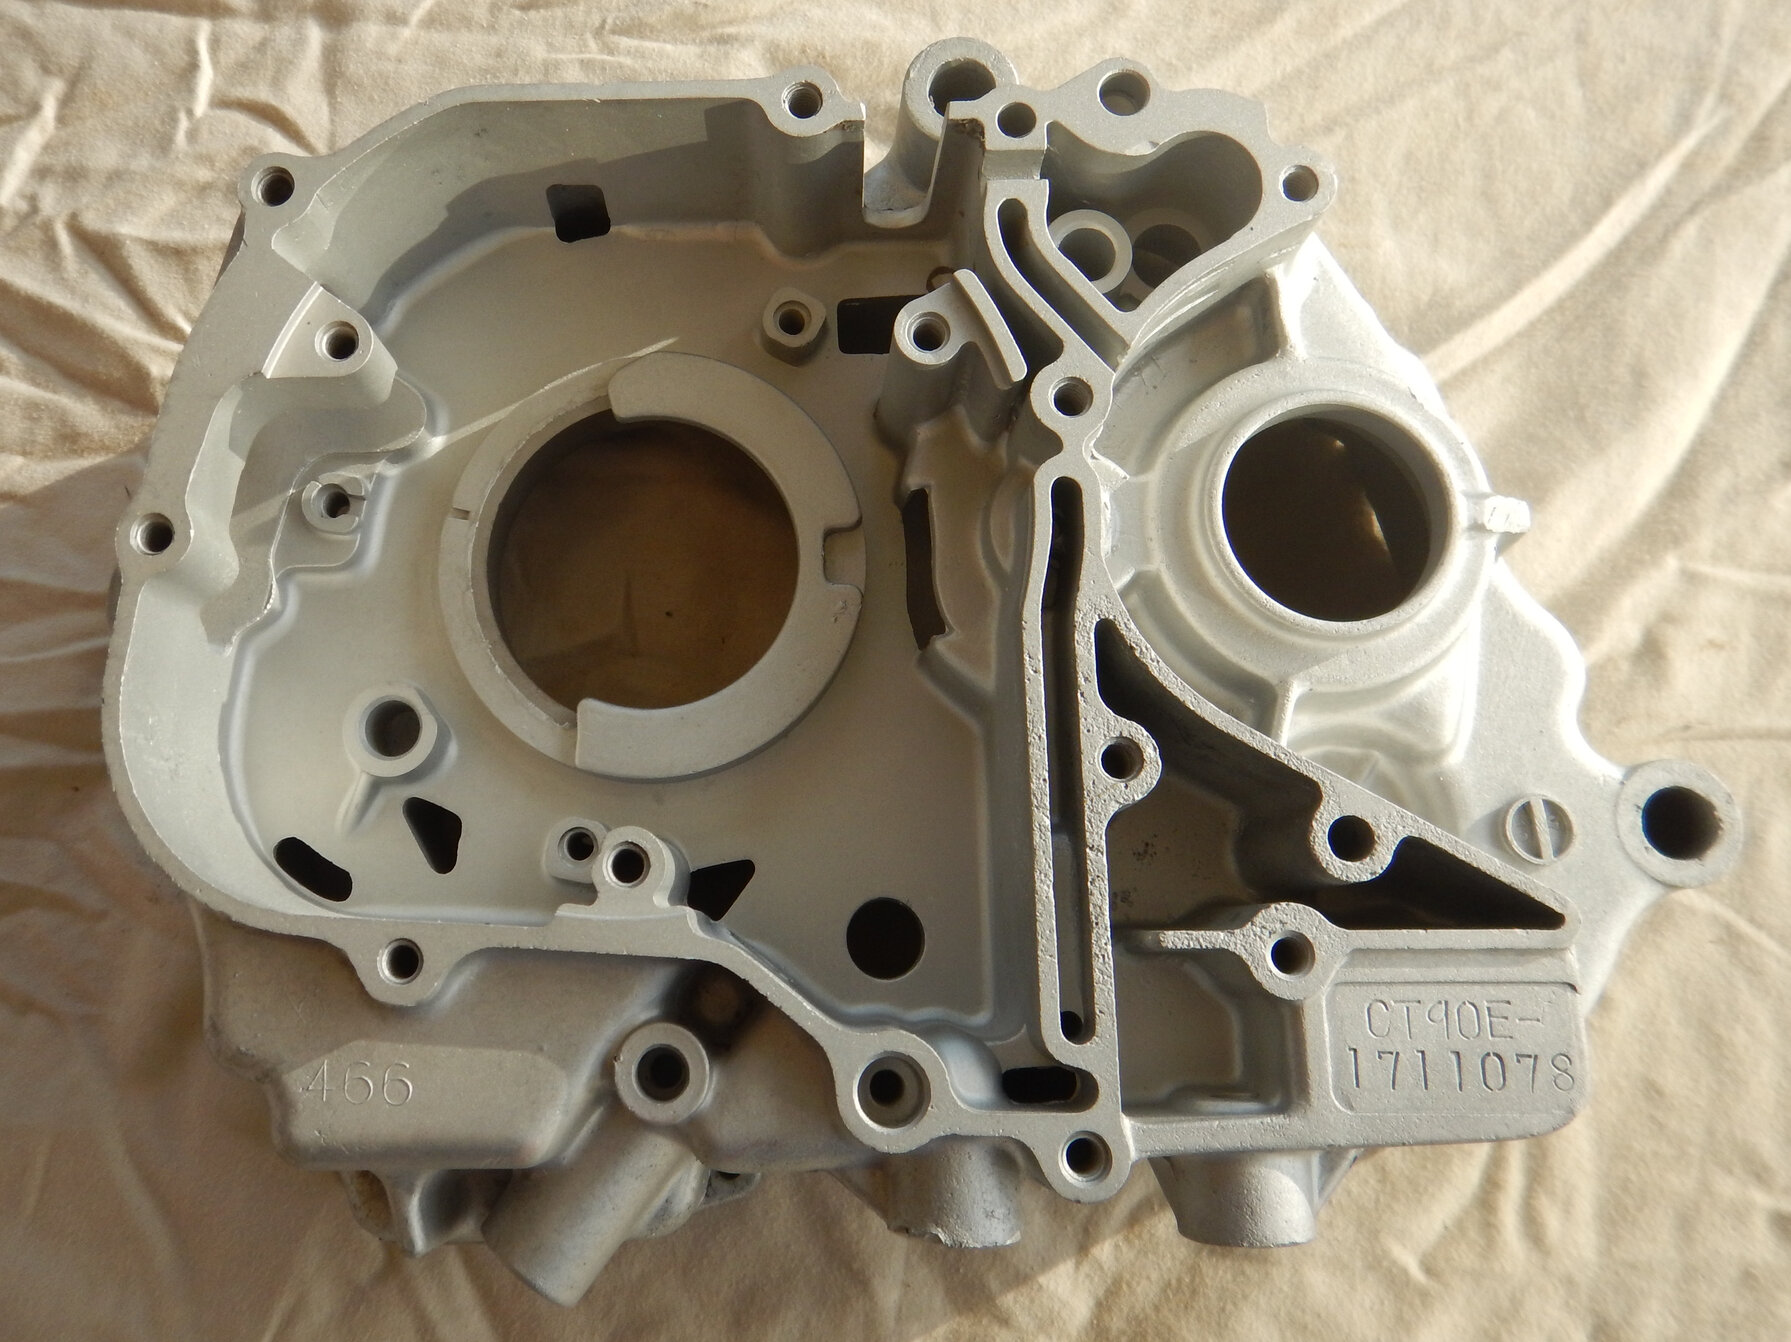
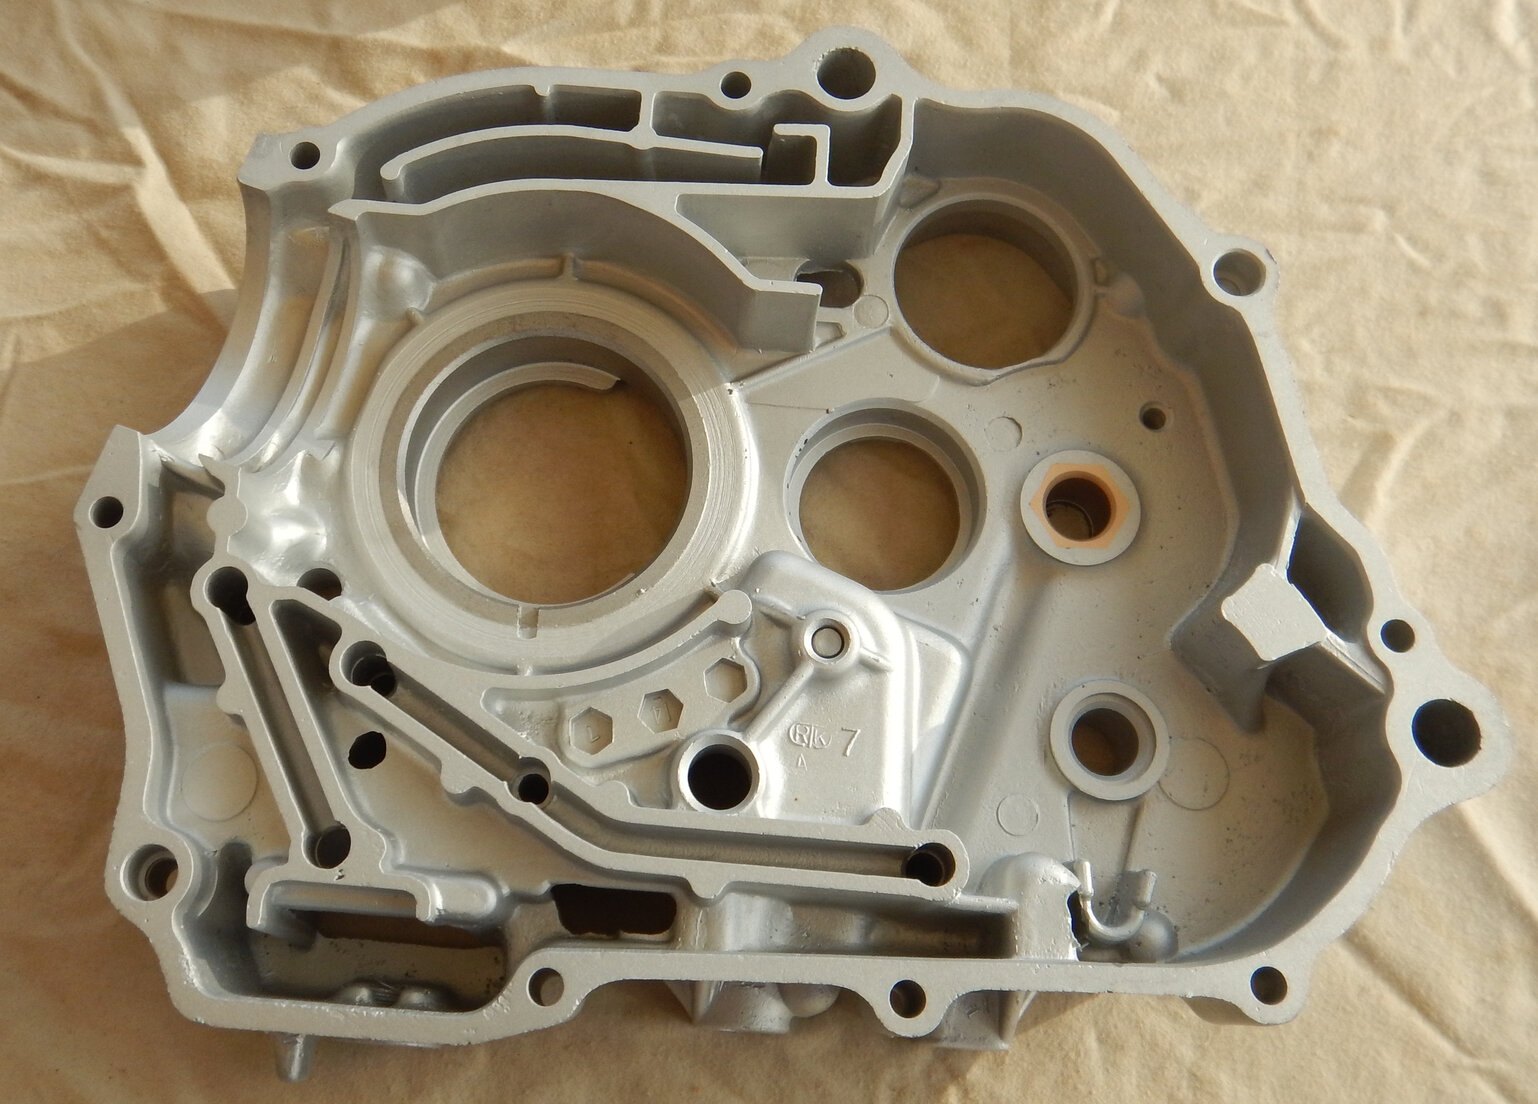
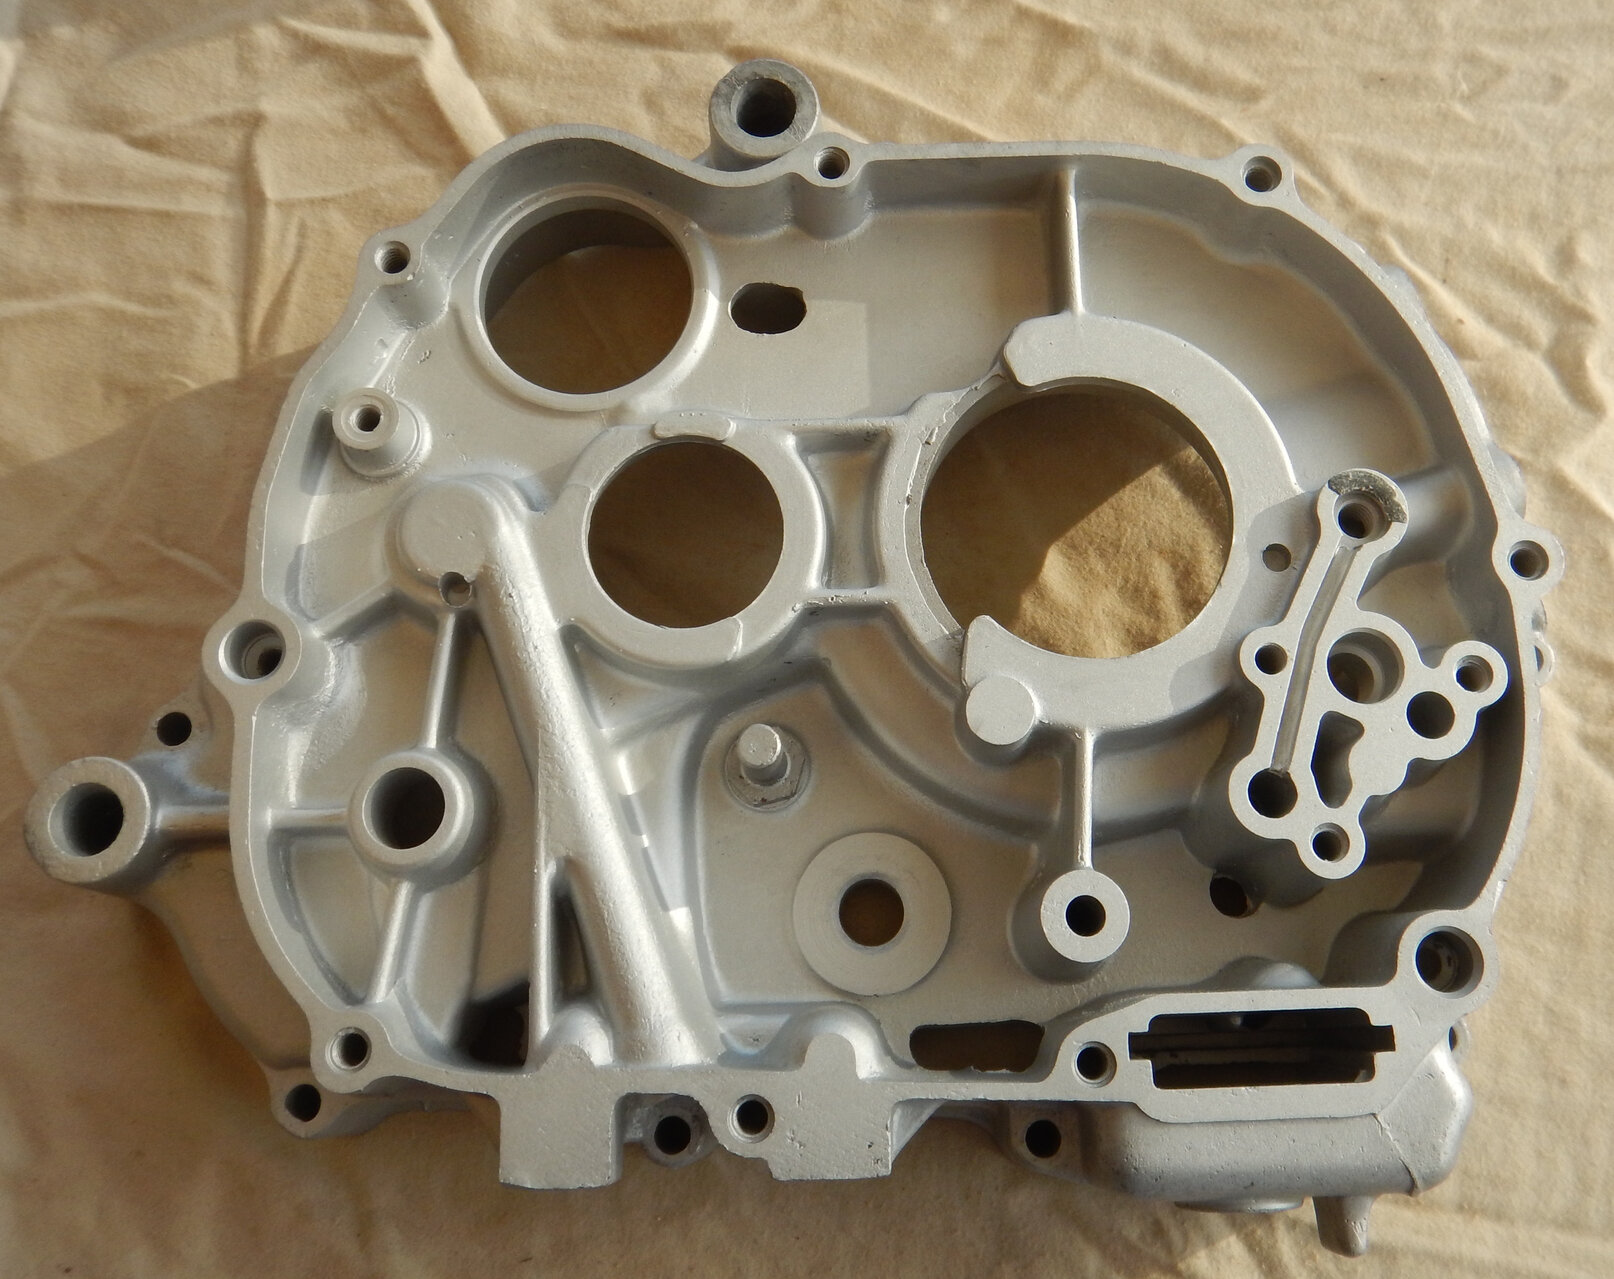
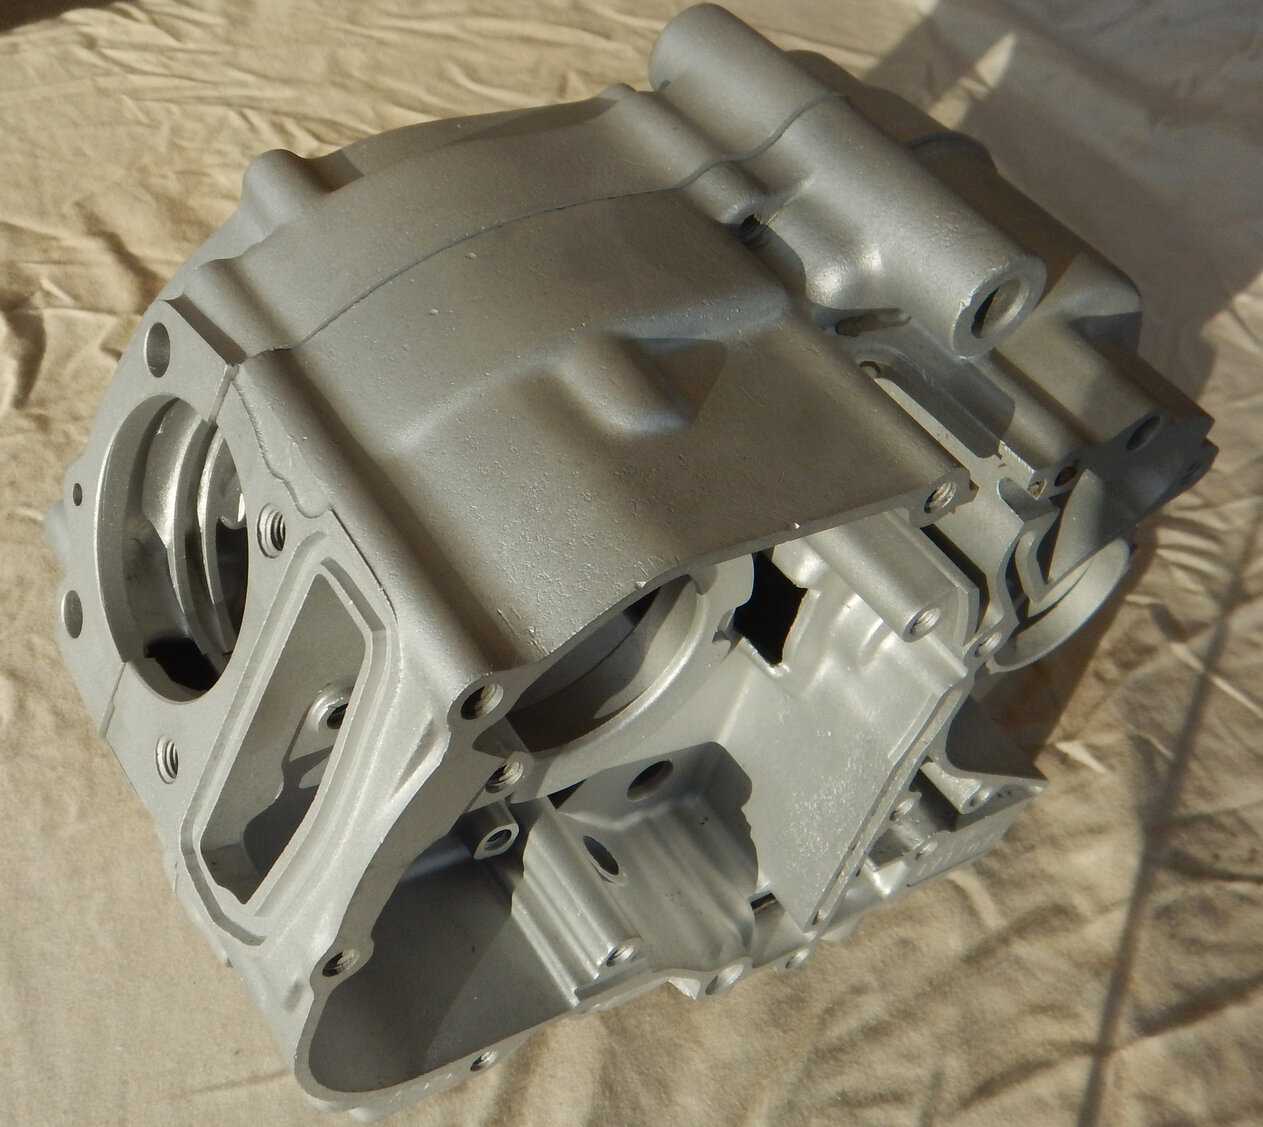
So first things first - The Crankcases.
All the Bearings and seals were removed. I know my main goal with this engine was to replace almost nothing, to see if it could be brought back to life again, but I figured the consumables were fair game, so seals and bearings will be replaced. Although I do kind of wonder how those old rusted, completely crapped out bearing would have performed if thoroughly cleaned and lubricated....but I guess we'll never find out now.
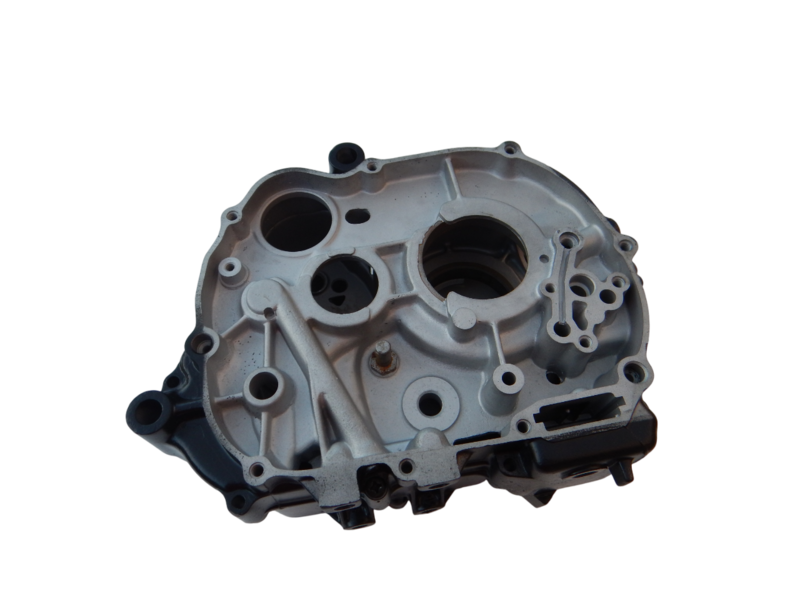
Here is how the bare crank halves have come up after Vapour Blasting. They look surprisingly good. I see a few little nicks on the mating surfaces, but nothing that is too much of a worry, as none of them are full thickness, so a good seal should still be acieved with good gaskets and a sealer.

Next is the Crankshaft and the Transmission.
I've got the new bearings, but I'll have to split the crank to install them. I've never done that before - so it will be interesting to see how it goes. I have been doing a lot of research about how to balance the crank, so we'll just have to see how it goes.
And then, the Transmission - again, new bearing have been bought - just have to get it derusted and assembled.....I wonder if I can sand blast a disassembled transmission.
13 March 2025
I've had a slight rethink about this engine...
My plan waqs to use this as a simple exercise to see if such a beat up engine could be made to run again without any new parts, or at least only with new consumable parts.
My plan now is to do exactly what I had orginally planned, but instead of it being just a fun exercise, to put this engine into the C90 Delux Basket Case you can also see on this page.
The rational behind this is fairly simple. I like to restore bikes to their factory condition - but the Basket Case C90 will never be going back to Factory Condition without spending a lot more money than I am preapred to spend. So, I decided I was going to do up the little C90 as a mini Army/Military Transport Vehicle. If you check out the 1976 C90 Page, you'll see its frame and running gear are already turning a very military shade of flat green.
Anyway - I got to thinking that an Military Bike might benefit from the CT90 Engine's Hi/Lo Range Gearbox - and the decision was made. I don't think there are too many issues chucking the CT90 Engine into the C90 Frame, or at least I hope there isn't. It looks like all the engine mounts are in the same places, and the wires coming from the stator on the CT90 appear to be the same as on the C90. They are both 12V, so that's a bonus. It seems like a good solution to me - all the money I'm spending on the engine won't be just an academic exercise. it will go to a real purpose, and it will allow me to give it a good test, which would have been a bit more difficult with the engine on an Engine Stand.
I've got about 5 or 6 C/CT90 Engines sitting around, so if it all turns ugly, I can always go back to the original engine from this bike.
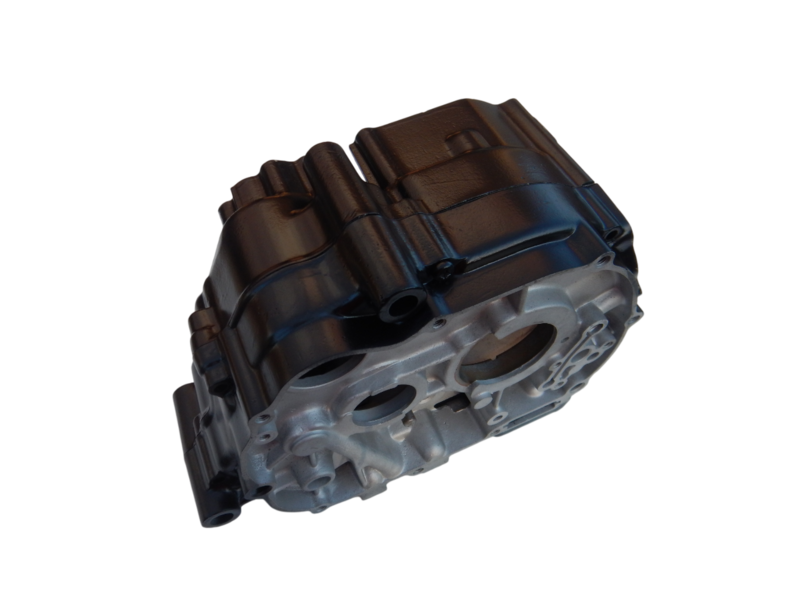
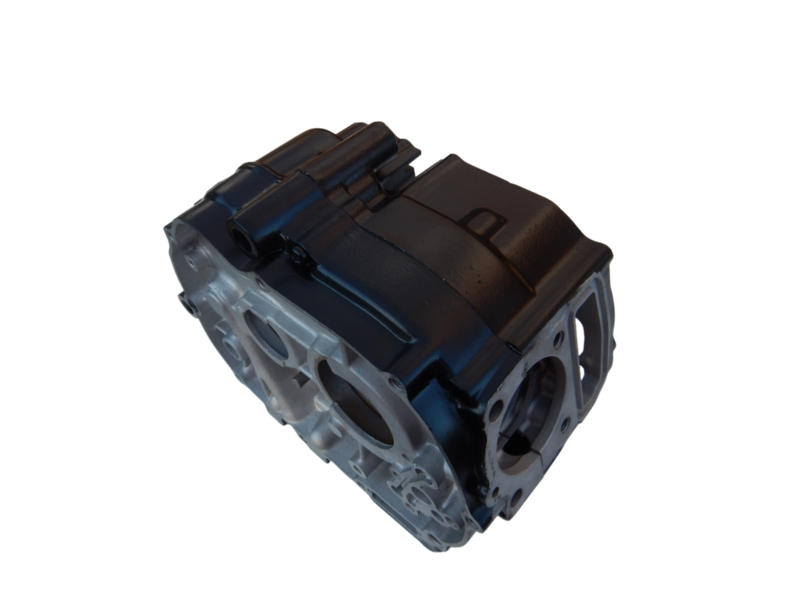
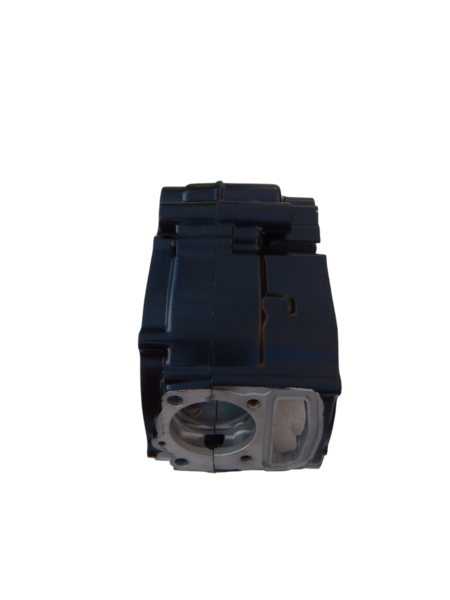
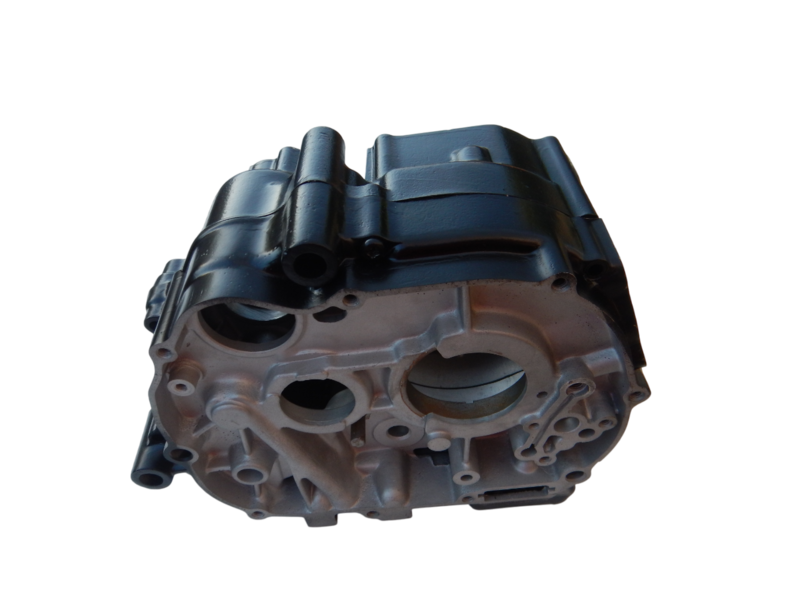
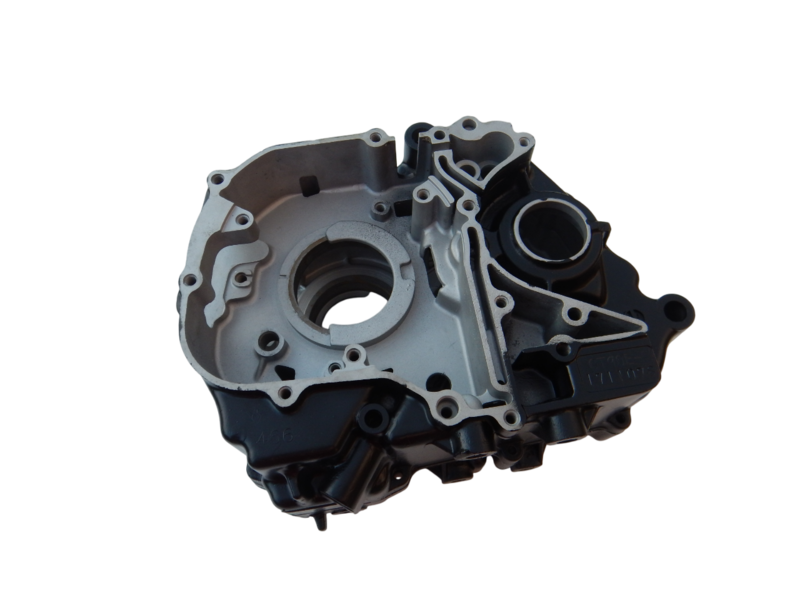
So the point of all that is - the Engine in the photos above has changed slightly, the cases will no longer be Aluminium coloured - they will be blacked out. We can't have a Military Bike with big bright shiney engine cases - so they have now been sprayed Black. The plan is all Frame and most of the running gear will be Olive Drab, and the other bits, satin black. Anything that used to be Chrome or silver, will be Satin Black - so Rims, Spokes, Headlight Trim, Engine, and a bunch of other stuff.
Here how the Engine Cases look now.
18 July2025
I've found out I am moving to Switzerland soon, so I've got to get a move on so I can store all this stuff in a sensible manner so I can get back into it when I returnj back to Ayustralia, which looks like it may be quite a few years away.
So - at the ve4ry least I need to:
- Get the Crnkcases back together, which means I need to:
- Put the transmission back together
- Fit the Kickstaerter
- Fit the Crankshaft
So yesterday and today I've been concentrating on getting the cases back together.
The Transmission itself went together OK. You may recall from the photos above what a complete rusted mess it was. I took the questionable decision to disassemble the entire transmission to the last piece to clearn it up. (Remembering that the whole point of this exercise was origianlly just to get this thing running with no, or as few as possible new parts - kind of a testament to was sort of abuse/neglect the little Honda engines can take and still run).
Everything was wire brushed as well and I could, and then dumped into a Citric Acid bath for a couple of days. Then washed and cleaned some more. Small parts lile spring clips, washers etc were carefully sanded. Most things came up surprisingly well - considering what I started with. Here's a reminder of what they looked like when I split the cases:
I'm sure you can imaging how difficult it was to get all the gears/pins/clips/drums etc separated, cleaned up and runnig/rotating freely again - (if this bike engine ever changes gear again it it be quite a surprise)
The questionable part comes now.....I decided to get the gears, gear shafts and the shift drum and forks blasted. I discussed it with my blaster and we decided it should be done with something fairly gentle, like glass beads. Hmmmmm - not sure it was a good idea...but I done it anyway.
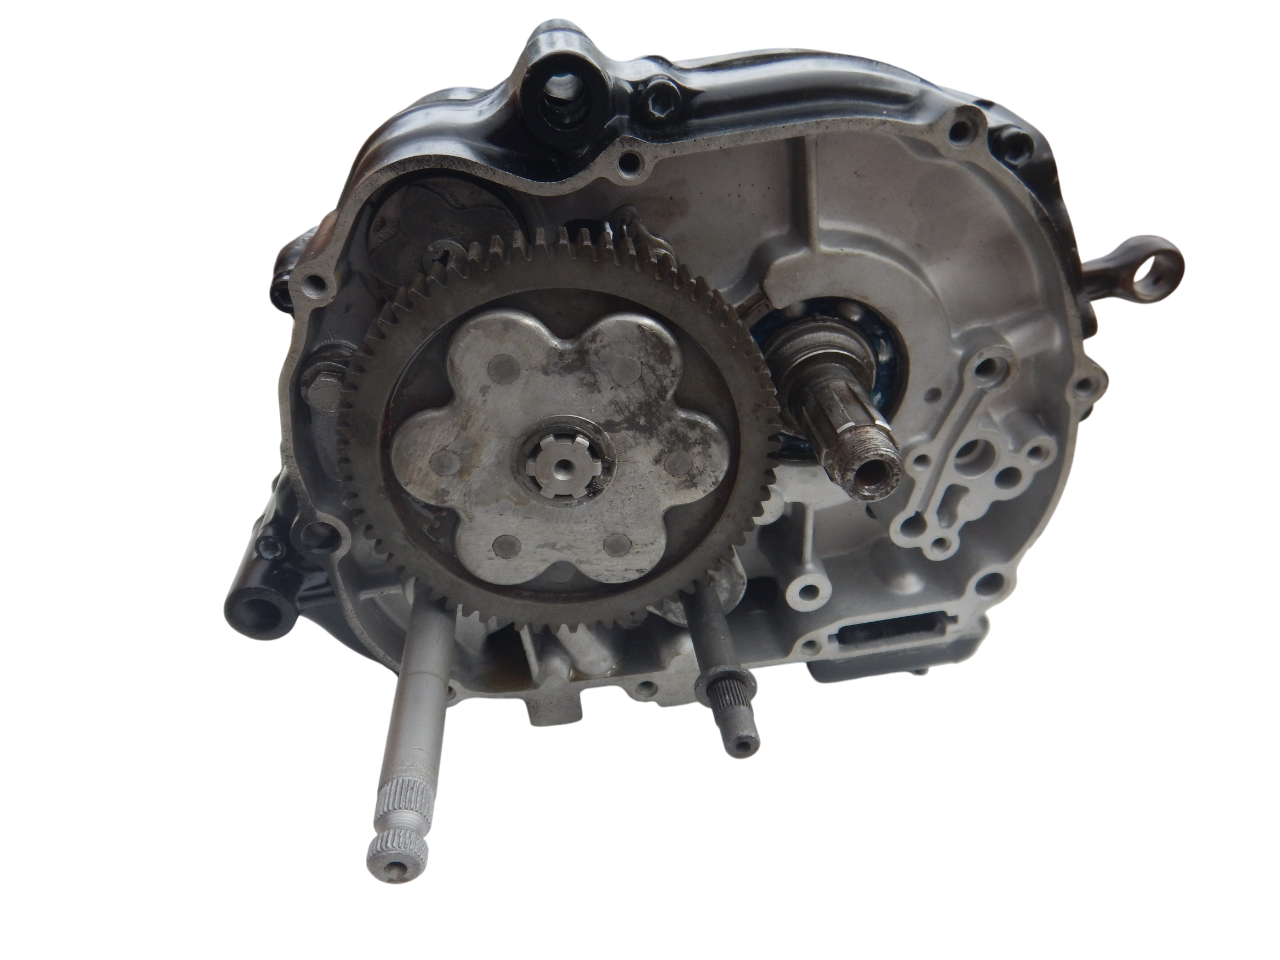
They came up surpisingly well, but they did have that typical "blasted" look rather than the nice metally look gears usually have.
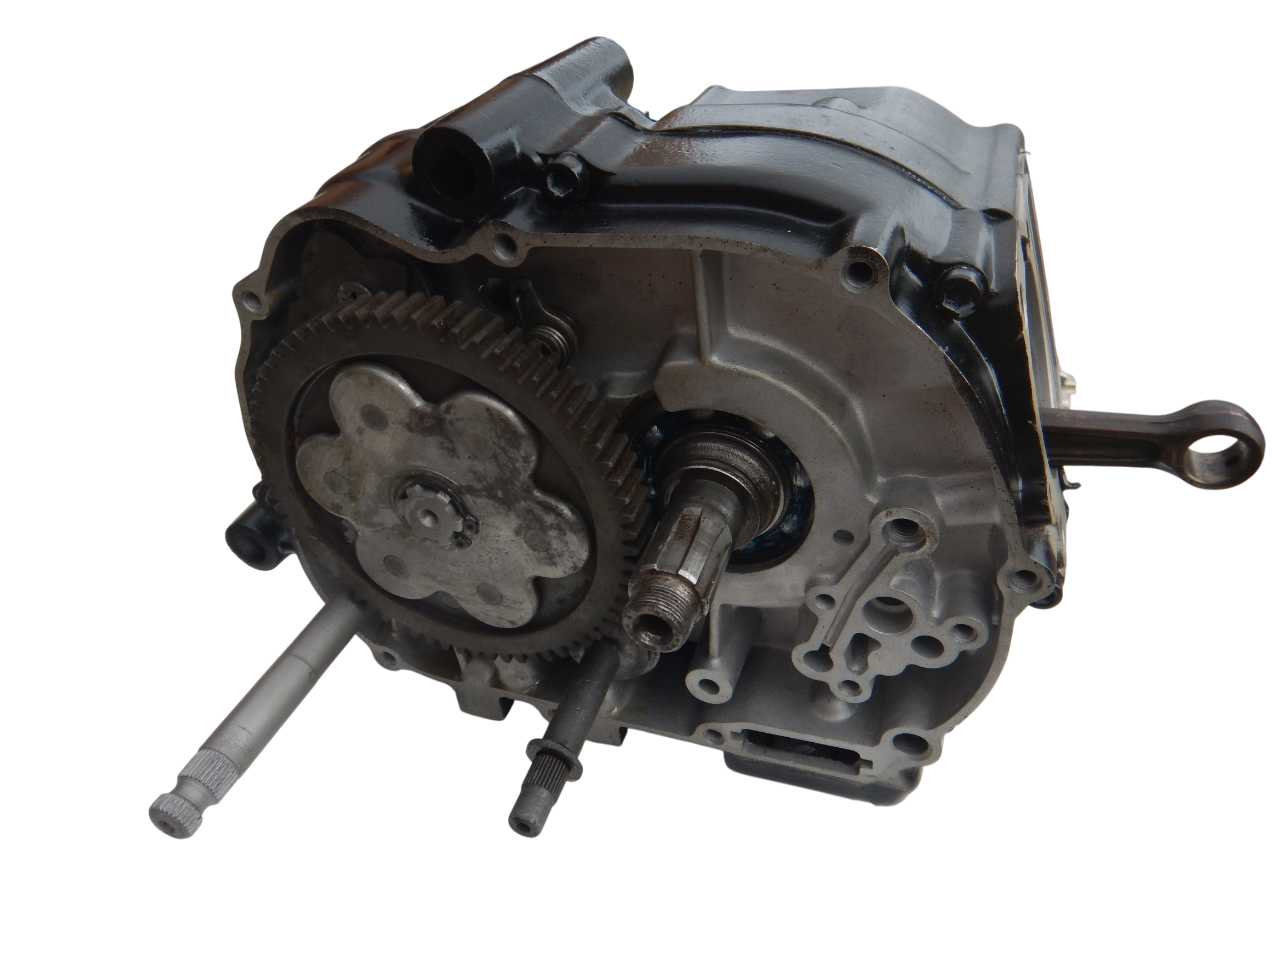
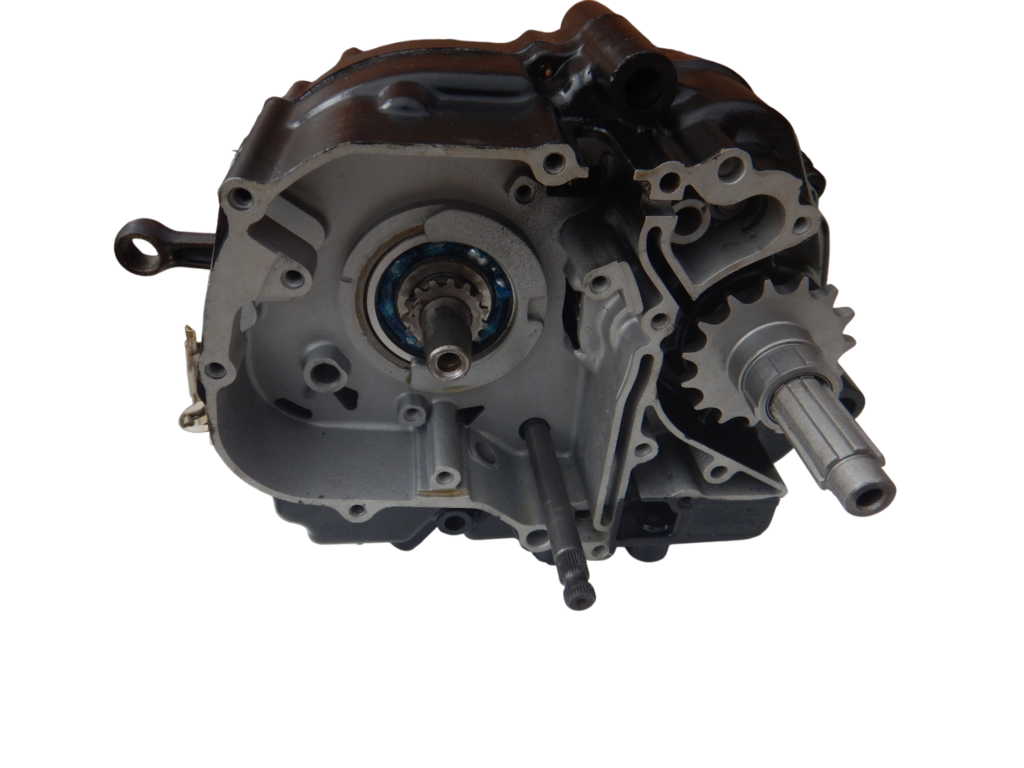
This what they look like fitted to the crankcase:
Now that the Transmission, Crankshaft and Kickstart are in place - time to button up the Crankcases.
This what they look like fitted to the crankcase: